Building a project management tool
Watch an intorduction video to the application
It's been a long road of trying to find methods, systems and strategies to manage projects customers and resources in a good way, that keeps everybody up to speed all of the time and make sure that nothing fall between the chairs. A few months back a couple of ideas collided into a new concept, that might even turn out to become a service online. Sometimes I try to write about how to start and run a business in some of my blog posts and in that spirit I want to bring you with me on the journey as I try to create some kind of business around this. Hopefully it will be inspirational. I am certain I will learn a lot in the process and I hope you do too.
Problem definition
How do you manage your projects, customers, co-workers, partners, tasks, meetings, invoices and other related things that you need to keep your business working as smooth as possible? Are you using your inbox as a todo-list, perhaps maintaining tens or even hundreds of spreadsheets or are you trying to squeeze your business into some of the smart online tools like Monday, Slack, Trello, Asana, Teams, Super Office. Have you hired a developer or team of developers to develop your own tool or maybe even set up a SAP solution? No, I'm not going to give you the solution to all your problems, I'm guilty of trying most of these things myself. Each of these approaches have their benefits and downsides. Regardless I want to try a new approach to see if I can tackle this management issue in a new way.
Feedback
I want explore an idea I had, that I have not yet seen on the market, thus I'm currently building a prototype to see if it will help me and at the same time I want to ask you two very important questions:
1) Have you seen anything like what I'm proposing, I would love to try that out. Instead of building it on my own. It might save me some time.
2) Do you get inspired by the idea and would like to try it out. Feedback and early adopters are more than welcome at this stage.
The idea
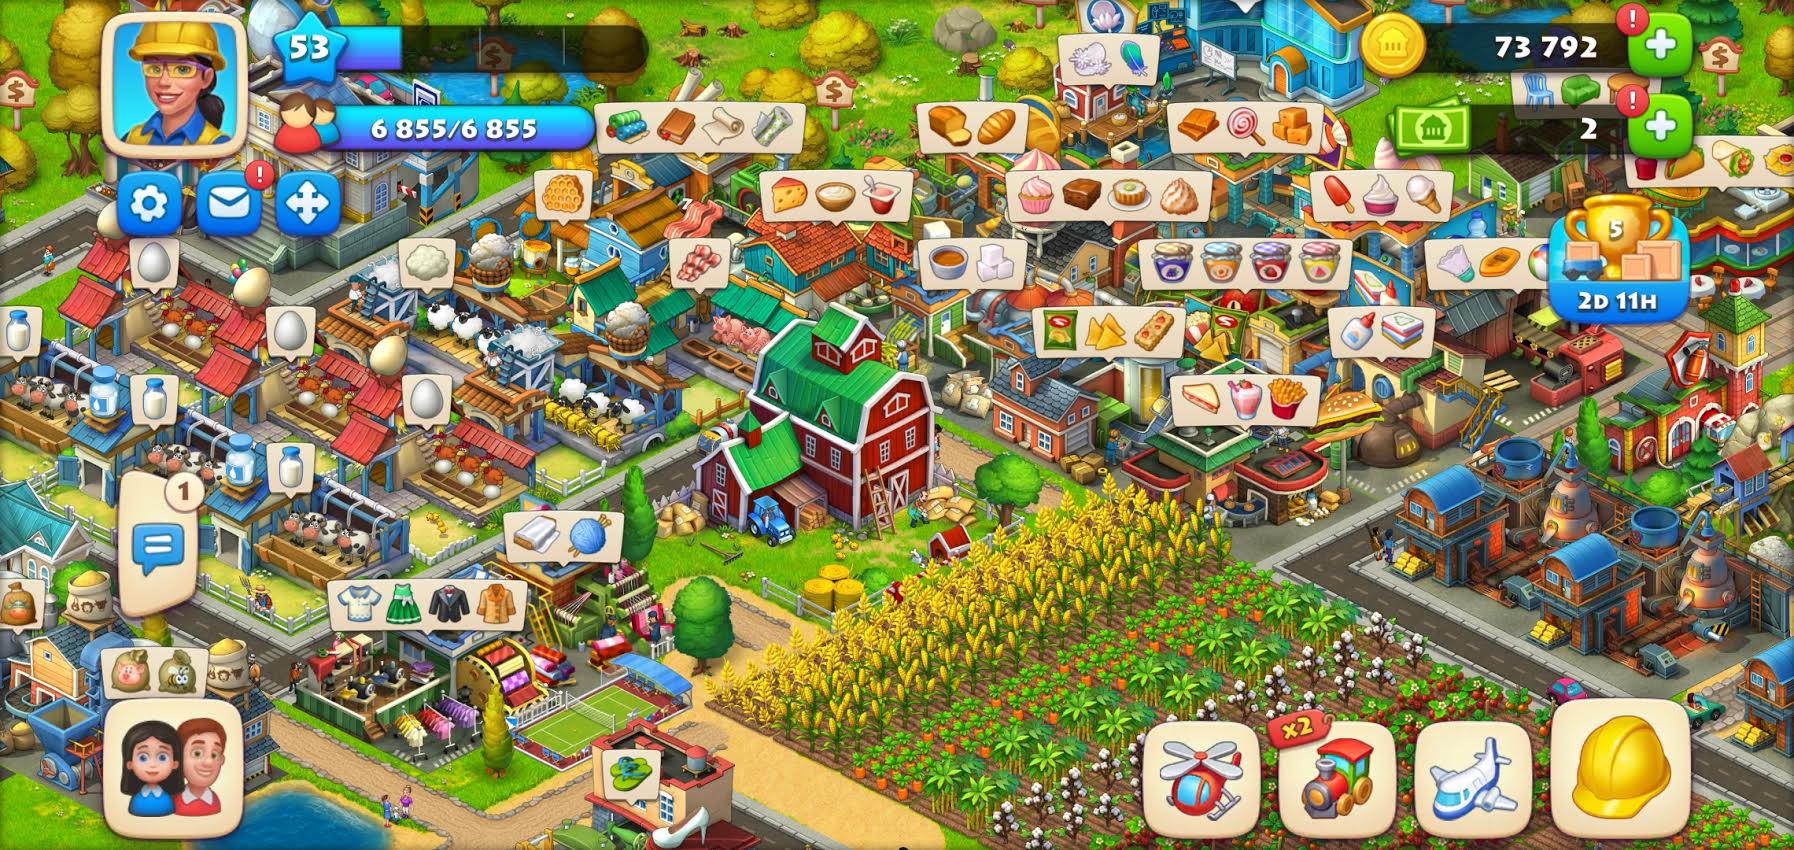
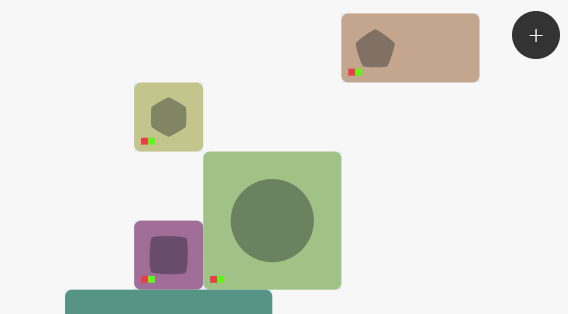
Have you ever played a game like Township, Sim City, Command and Conquer where you have squares where you place buildings that collect harvest, defend a perimeter and build things. I got inspired by the interface of those games and want to see if those buildings can represent customers, projects and partners. Giving a complete overview of your company just at a quick glance. This is the wet dream of all BI tools that try to collect data from all different places in the business and present it in smart graphs and dashboards. But they often end up as reports that you at best look at once a month to see how the month was going or they end up on a large screen at the end to the hallway where no one is looking... No, the idea I want to explore is, if it is possible to create an interface that interacts with you as you are working with it. More or less as a game, that is quick and easy to update but provide rich information to all connected users.
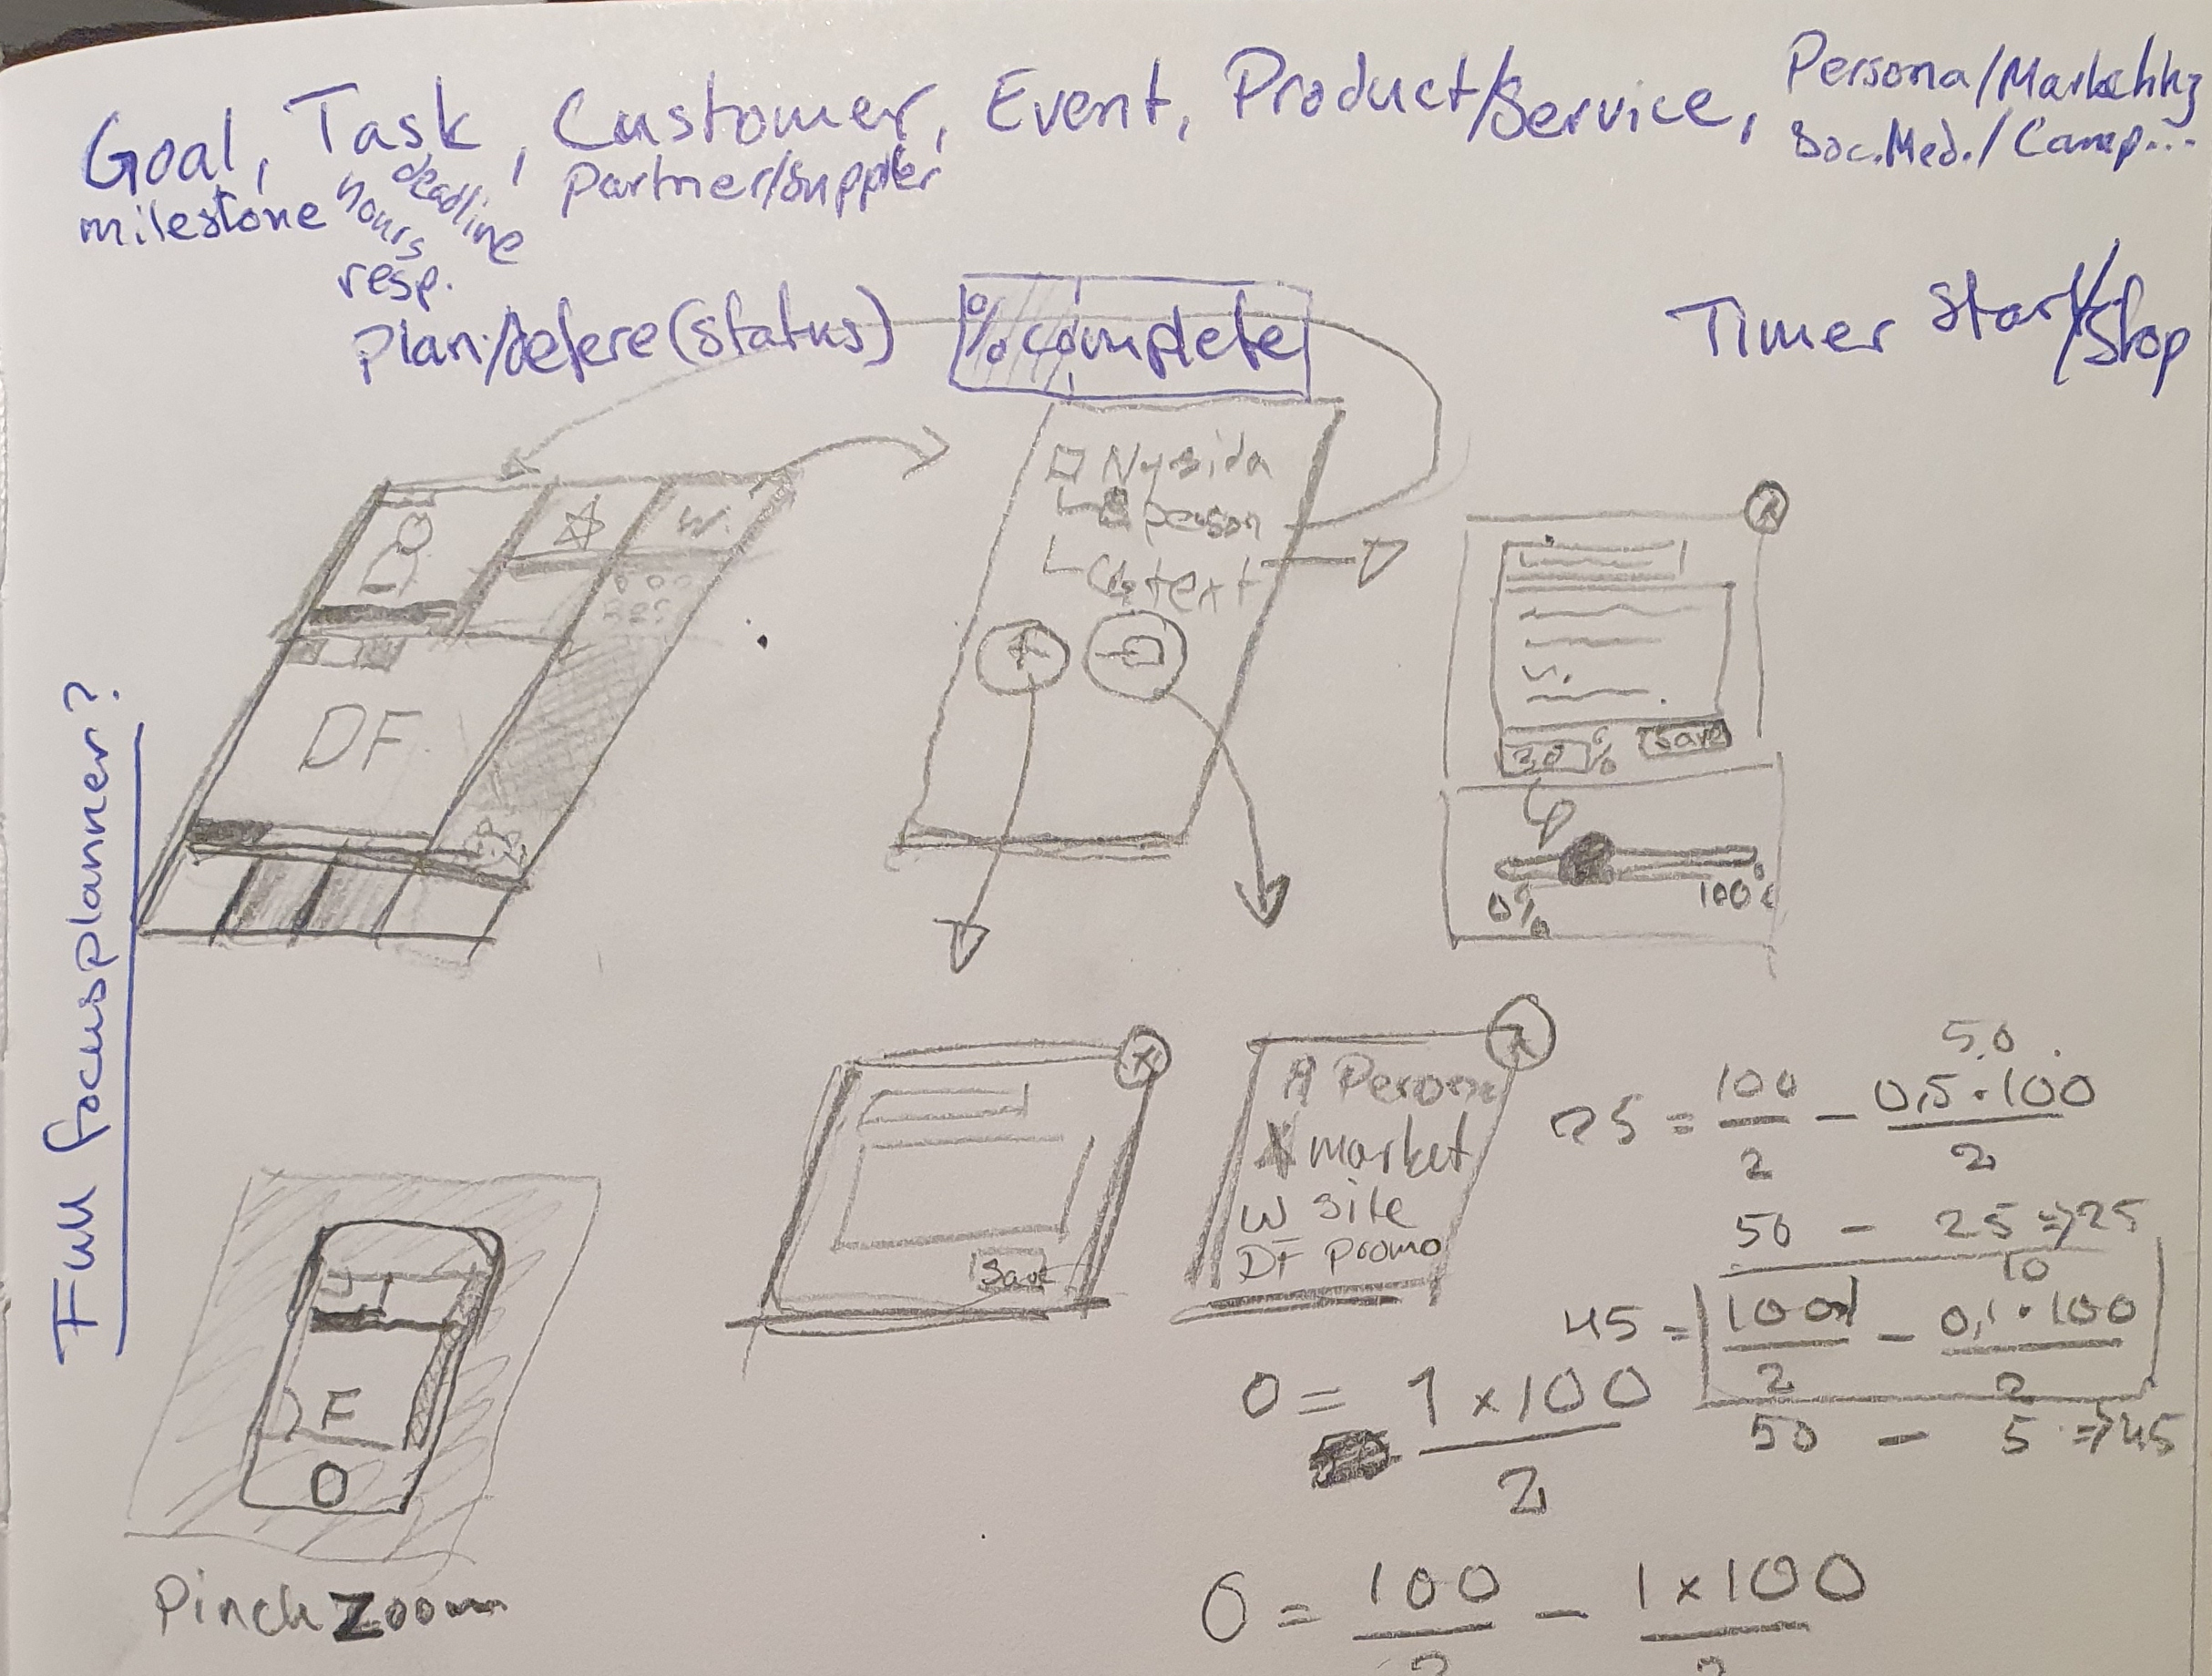
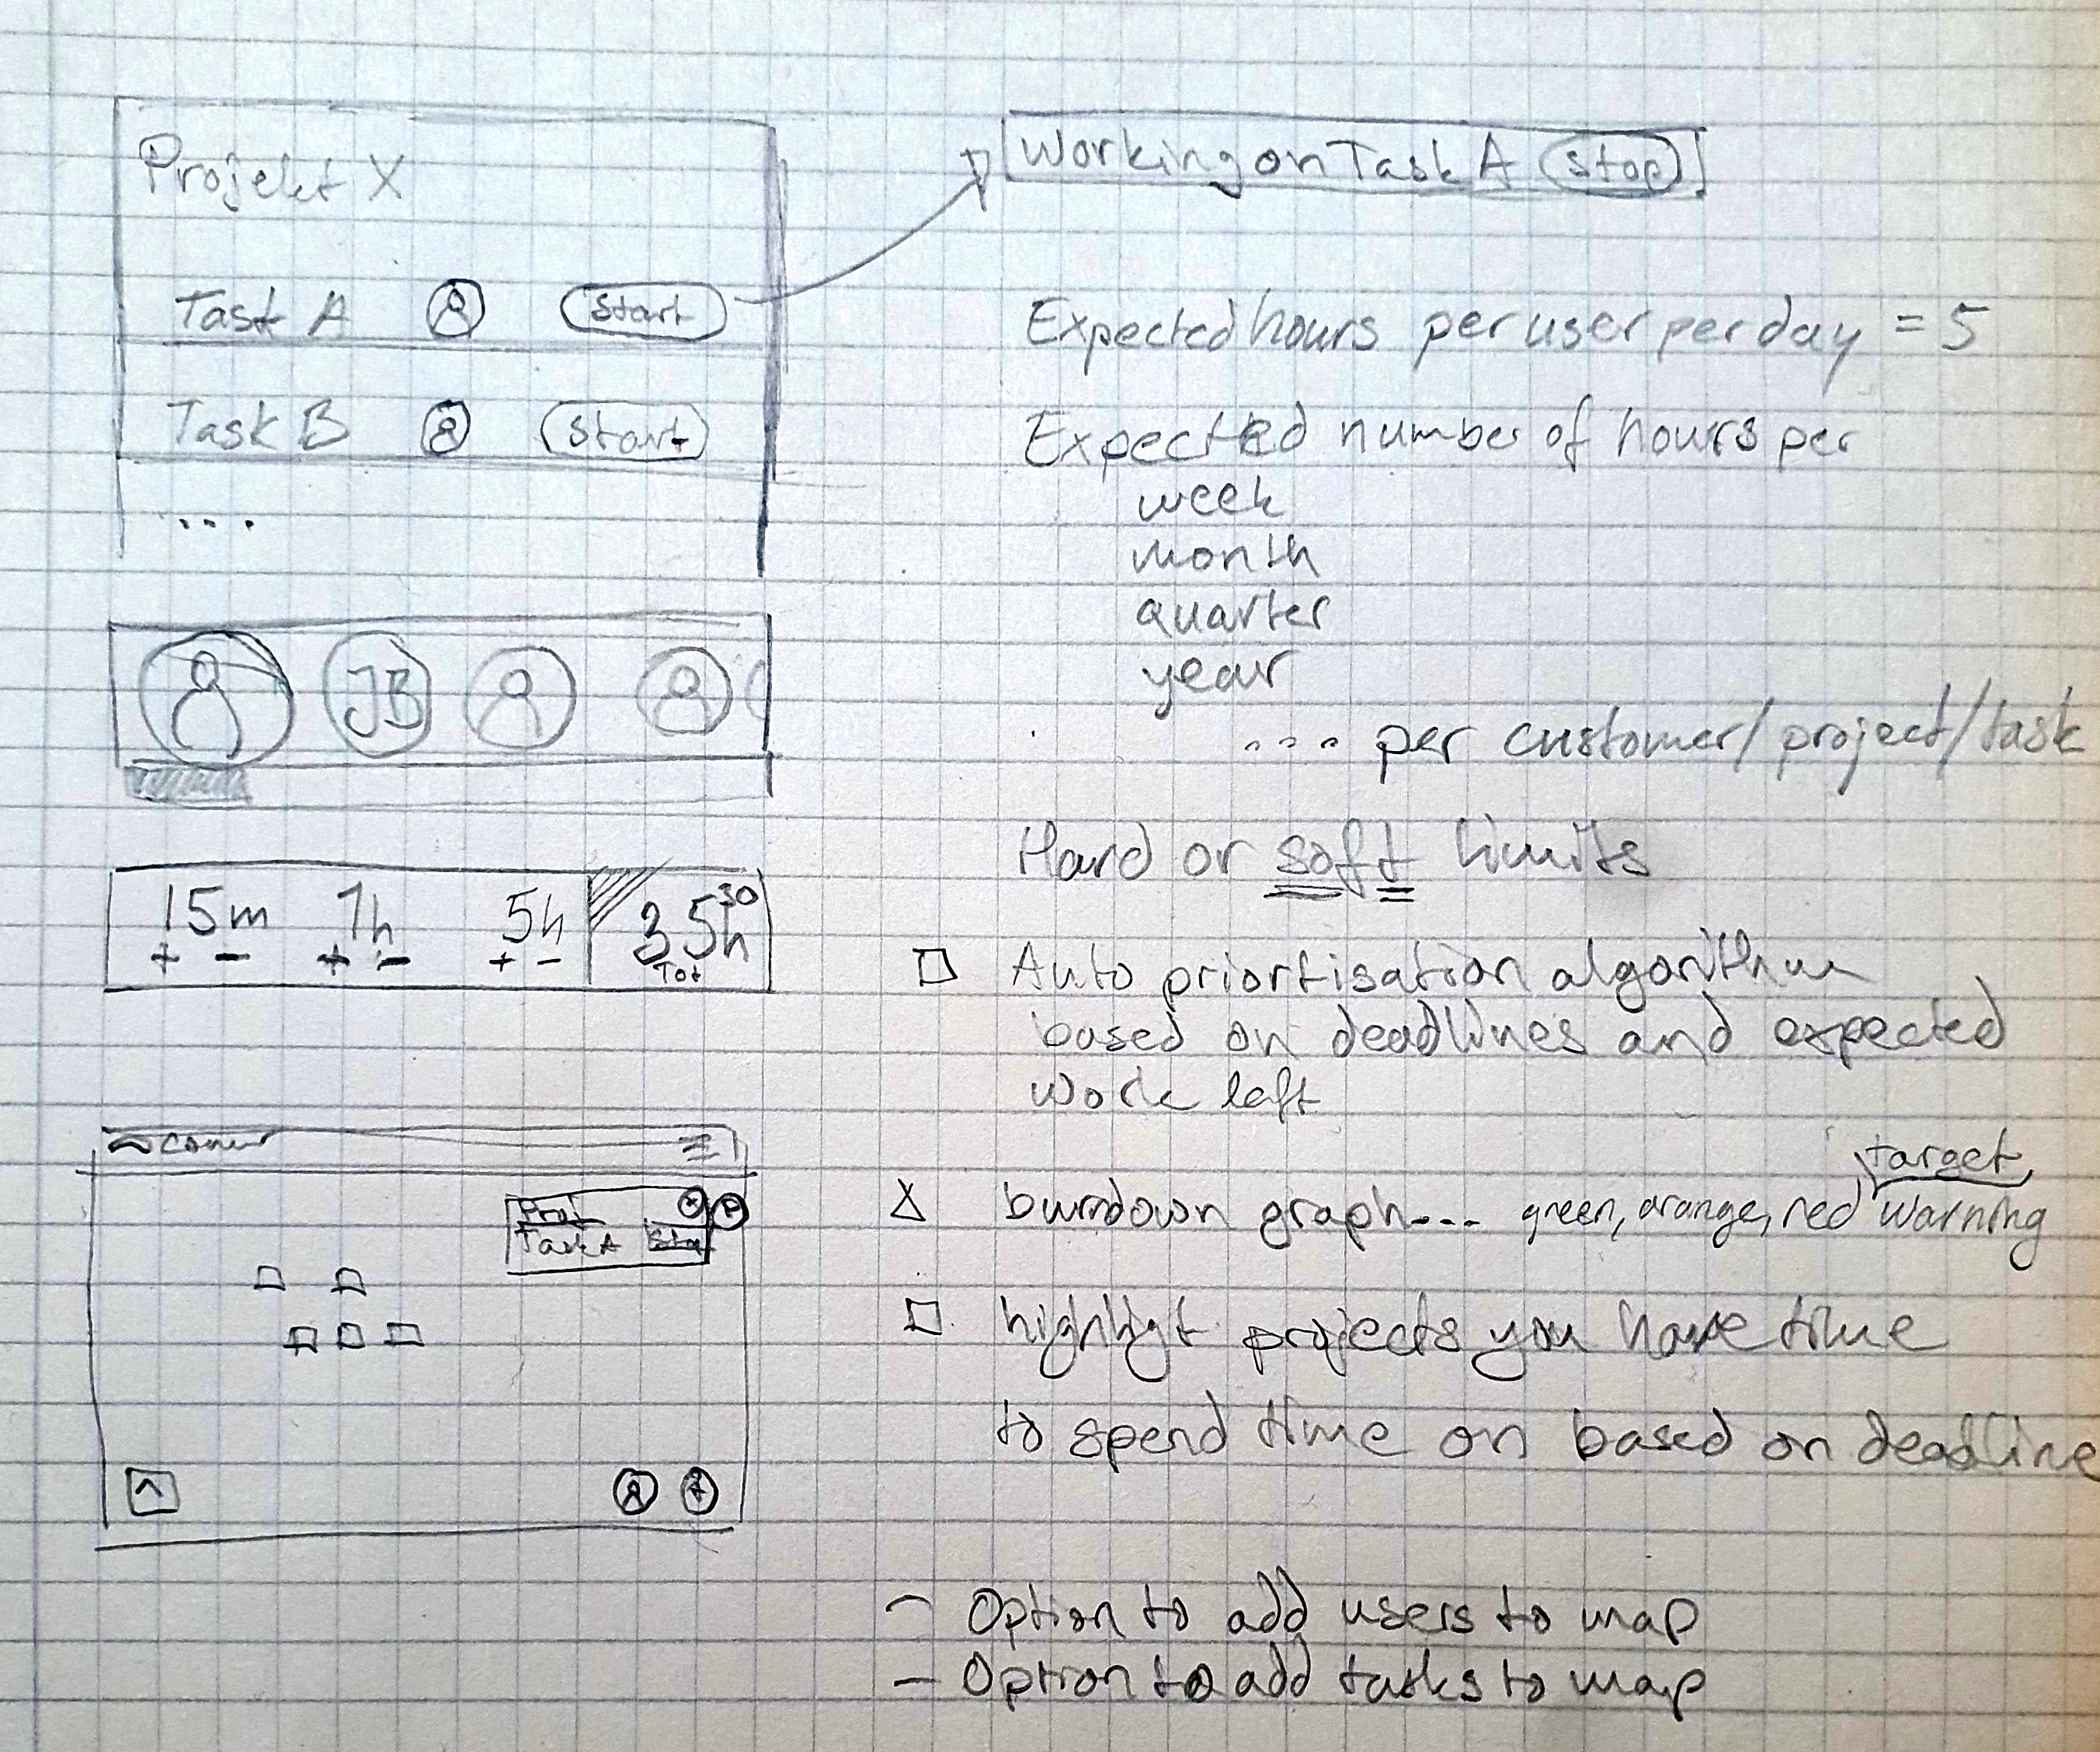
Step 1 - Draw the idea on paper
First I drew a sketch of what I want my first prototype to look like and added a few actions I want the service to manage. This way I can look at the result and evaluate if this is something I would even like to try to use on my phone. It does make me eager to see it in action and therefor I commit to building a small prototype. Now starts the issue with falling in love with your own idea. That is why, after the prototype has reached the stage I have described on this piece of paper, I am reliving myself from the task of deciding about the future progress of the product. Then the idea is to see if I can get my colleagues and some friends to use it. The next validation point will be from them. If they keep using it for a month still eager to update and visit the application, then it is something I will allow myself to improve upon in. My goal is to go quite far to build the first proof of concept. Further than I normally do. But there are two reasons for that. The first one is that I want to see if I can pull it of. It is a bit of a challenge building this kind of interface and I'm a sucker for challenges. The second part is that I want to use this product myself and in order to try it out with the features I want, there need to be quite a few pieces in place.
Step 2 - Focus on the hard problems
Now we got a sketch, where do we go from here? Marketing would normally be a good place to start, and in a sense this blog is a first attempt at marketing, to see if you, the reader become curious. But before I go out and make any claims there is a bigger issue that is uncharted territory for me. Before I do anything else, I want to eliminate all uncertainties that might cause delays or even make me give up on this project. In this project it is the interface. Keeping controls in one size on the screen while zooming, pinching and moving the background where all the information should be presented. As Seth Godin says, "Thrash in the beginning of the project to avoid problems at the end". I start looking for frameworks or samples on how to do this, but I only find a handful of implementations and none of them catch my fancy. If you read my blog post "Why I avoid frameworks" you already know my feeling about frameworks and I love the learning experience of doing things my self. I soon realize that there are two attributes you can set on a div that will solve my problem, transform.translate and transform.scale. And I know that I need to react to events like touchstart, touchmove, touchend, mousedown, mousemove, mouseup, keydown and wheel. The problem is getting all the math right to calculate the correct positions and scale on all events. Slowly but surely, I get more and more movements in place. But when I come to pinchzoom I ran into problems. I spent an entire day trying to figure out why it was not working until I realized that when you zoom with the mouse, you want to zoom where the mouse pointer is as you move it but when you pinch you want the map to follow your fingers as you pinch. Interactive demo at this stage
Step 3 - Make it presentable
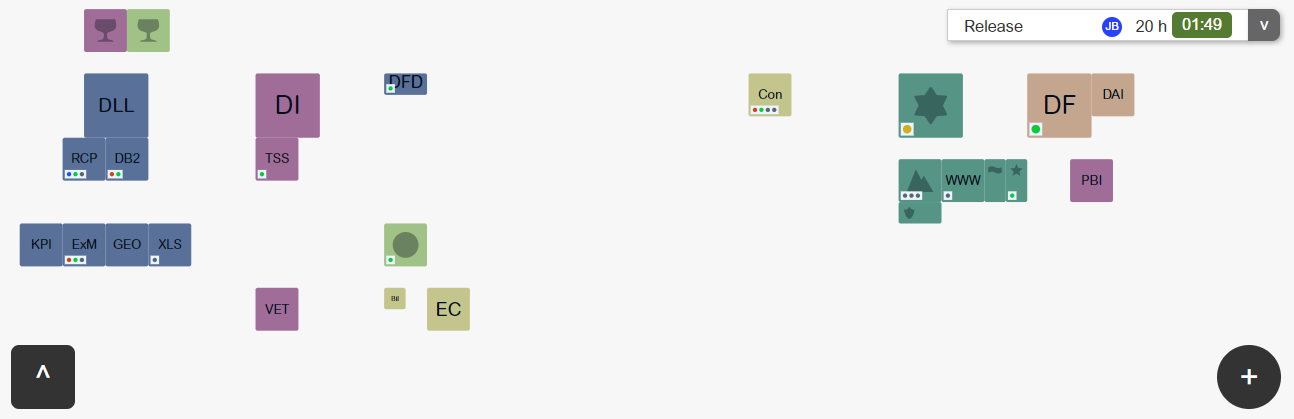
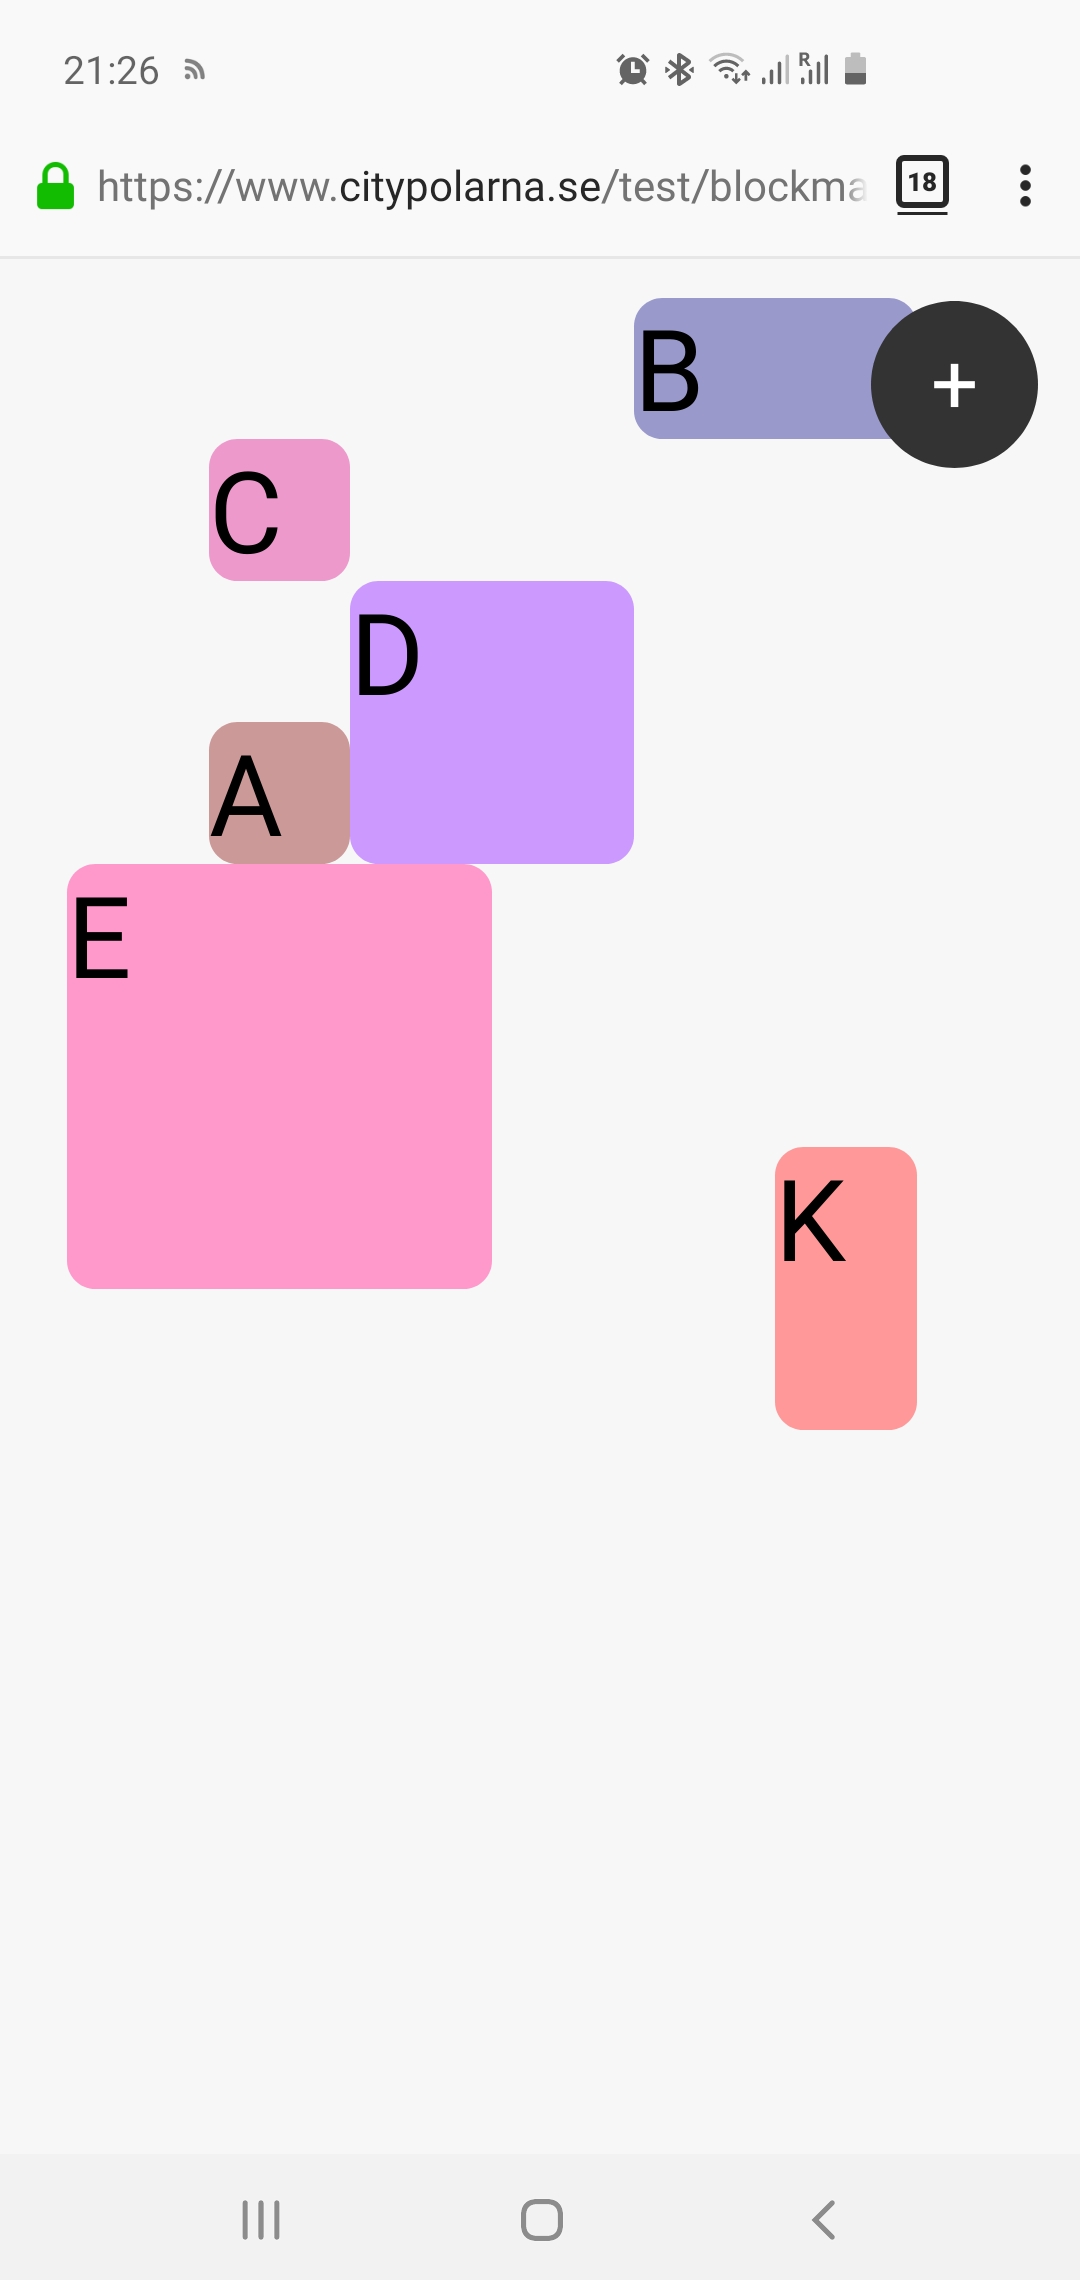
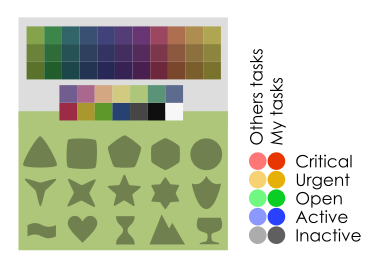
I know I can get the database and application back-end in place with ease, so the next important step is to get the design or the interface to look good. This is something that I often overlook, because most of the time I build applications for businesses that want a specific problem solved and they do not want to spend extra on design. Unless their customers are supposed to visit the application as well. Then they at least want to include a logo and some brand colors in the application. Other than that, graphic design is usually something I implement after a designer have been doing some great looking sketches. But this time I have no budget for designers and it is just a proof of concept, so I have to do the best I can. What I have in mind is that there should be a set of 5 to 10 predefined colors that should appear in at least 3 shades and I need a default set of 5 to 10 SVG icons. The idea is that you should be able to upload your own icons and images as well in the final product. But for now, I want some defaults to work with. I also want to use red orange and green as status indicators for projects and blue if a user is working on a project and perhaps grey for projects with undefined deadline. Perhaps there should also be some additional alert icon that can set a warning on items where you really need to take action or a co-worker need help.
When it comes to colors I usually opt for very clear bright colors. But over the years I realized that this can be a bit straining for the eye and since I want to have multiple colors side by side they should play a secondary role, thus I will try to keep the colors a tad on the grey side. The important feature of the icons is that they should work well in any scale. This meant that icons based on lines was out of the question, I need to make icons that are filled. They should also be used to represent ideas and concepts of any sort. This means that icons like a mail or a phone is not what we are looking for, more like abstract shapes that differ enough from each other to easily be identified. I might be wrong here, and there might be a very specific set of icons that will be requested further down the line. But for now I do not want to lock in to specifics.
Step 4 - Name the project
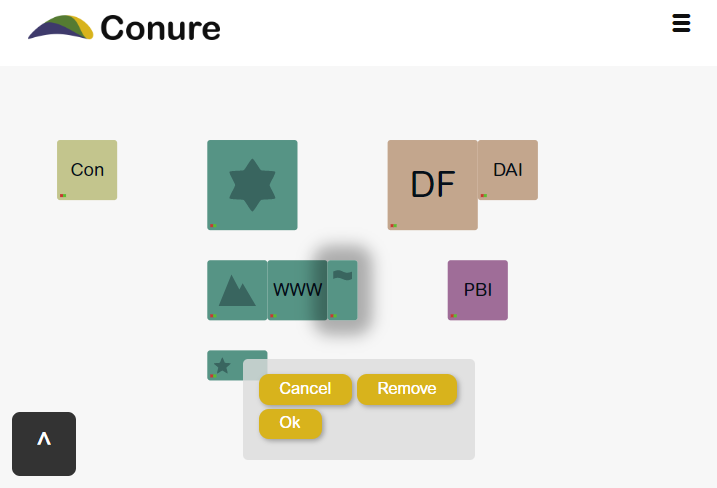
This section started out as the database design. But I had to add the naming here, because I wanted to find a name for the database and since I want to make this into a product I might just as well pick one now. I started thinking about the obvious: blockproject, blockmap, projmap that could explain what this is. Then I tried to find something about the benefit, like organized, structured, overview and stumbled into birds-eye view. Now that does not make a good name, but it immediately got me thinking of birds. Smart birds, a quick search gave me a list and there it was. The Conure... of course conure.com was bought but I was just as happy with conure.me. As in "Make ME smart and more organized with a birds-eye view over my business".
With a name I also wanted to create a logo. The obvious place to start was with a picture of the bird. I found a lovely photo on the cover of a book, with colors that I liked, that I turned into an SVG version. A logo should be simple and I did not like the representation of an entire bird, I wanted to find the essence, the smart head perhaps. As font I quickly glanced through the available fonts in Ink-scape and found "Arial Rounded MT Bold". I liked it because the soft edges on the letters conveyed the comfortable feeling you get when you have full control over all your projects. But the bird head did not match the soft touch of the letters and I was not too happy with the colors either. After a few experiments I ended up at the wings that carry you up to get the birds-eye view you want over your projects. But after using that as a logo on the site for a while during development it felt too abstract and I returned to the idea of using the entire bird in some way, and after a few iterations I arrived at something that felt well balanced and recognizable. I do still lack the sense of project management, but a logo only have to be recognized in the sea of other logos and I feel that this bird does a fair enough job at that as it is. See the process below.
![]()
Step 5 - Design the database
It starts to look good and I'd love to jump into writing some more code to make the interface work, but I need a place to save the content. Since I have played around with the interface a bit, I start to get a feel for how I want it to work and thus it is time to setup the database to support the functionality. I want this to be a highly dynamic application. Therefor I will make every block that could be rendered on screen from the same template, that I call an item. An item can have attributes like color, icon, position and size as well as relations to other items and users. I will also contain a JSON object for additional settings if I want to add features like a reminder, number of hours, integrations to API's and other neat features that might show up along the way, that does not effect the over all structure of the application. In order to manage relations to other items I need a related_item table and an item_user table. And that's it.
Step 6 - Tie it all together
I do have my own framework, built in PHP, that got everything I want. I'll use that as the backbone in this application. Just as I got the demo map integrated within my framework and started working on the code for the "Add New Item"-button I realized that I should probably make a few decisions about how the different sizes of blocks may be used. The problem is that the status markers on the blocks must be really small if they should be visible on all sizes of blocks. The conclusion from this is that I need to decide that only large blocks can contain sub-projects. The questions then become, how do I manage multiple sub projects that depend on each other in a tree structure. I suppose that it should be allowed, but only displayed in the main block for the customer/project you are working on and tasks that need to be completed on that project should be small blocks regardless. No, I do not want to limit the usage of the items, but I will limit the amount of information that the different items display. And you should always be able to change block size as you see fit when things in your projects change.
After about 1000 lines of additional JavaScript the interface is starting to get presentable. I can add items and move them around. They are saved in the database and re-rendered the next time I login to the application. It is also possible to pick icon, size and color of the block. I also added the option to write up to three letters instead of using the icon. It looks cool and is fun to play with, but I have not started on the parts that actually bring the value to the application yet. So far this is just a toy... but at this point it is large enough, that additional updates change things in existing code and it is a good time to get everything in to a versioning control system like GIT.
Step 7 - Connecting the dots
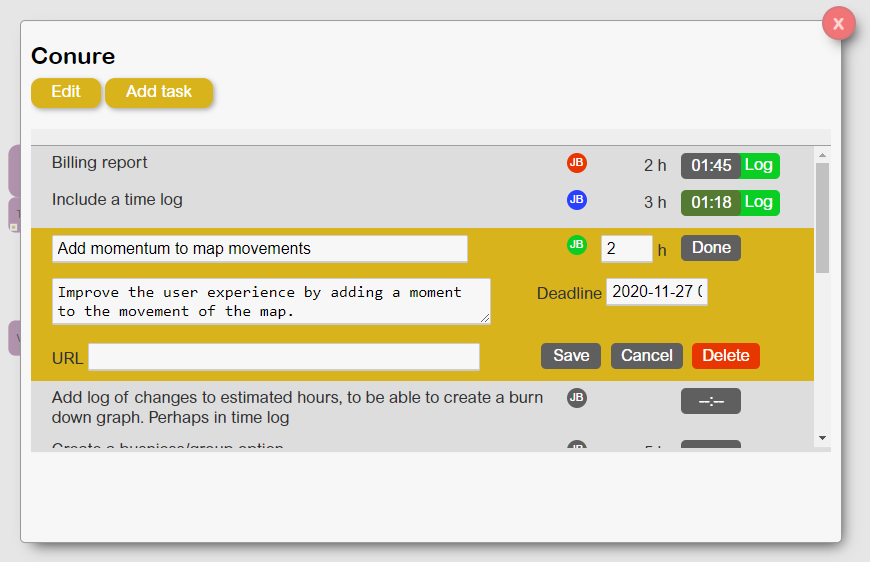
Now that we can add projects and customers to the map, we want to be able to add tasks and dependencies, assign users and hours to the projects and also register the time used on each project. That way we can do some fun calculations in the back end that can show a warning if a user is getting to much work assigned or if a project is running out of time. The hard part in this step is to figure out an interface that is just as intuitive and inspiring to use as the map. It is time for pen and paper. I always draw out simple mock-up sketches with pen and paper, because it is easy and fast. One idea takes less then a minute to get on paper, which gives me the option to iterate rapidly before I decide what path to take. Even after picking a path I can still change my mind, because when I start building the interface I can run in to problems with the implementation or I can get new, even better ideas as I see the interface growing. This means that after I have started the implementation, I rarely go back and verify that everything is where it is supposed to be, they are more like a tool to get me unstuck, when I'm out of next steps to take.
Another good thing to do here, is to write down the ideas for features you get while you test and develop. This becomes a checklist where you can refer back to and verify that you have added all the features you wanted and it will also work as inspiration for future development.
Step 8 - Publish the application
After a few iterations in step seven I start to feel that the application is mature enough for me to use for the primary purpose I wanted to evaluate. It is not nearly a complete product yet, but at least I can play with it, see if it is worth extending on and even share this with a few friends that can test the application and give me initial feedback and report the first obvious bugs. No project like this is free from bugs. There are always issues with different browsers, screen sizes, there might be cases that I have tested that worked when I created it and tested it that has been changed due to additional features added later. There might also be user experience issues where I have placed a button in a place that was obvious to me, but here no one else get the joke... A few early testers will smooth many of these quirks out before I move to the second launch phase.
Step 9 - Second launch phase
When I feel confident that the platform is performing as intended and all "must have" features reported by the initial users has been implemented it is time to post this blog and spread the word about the platform on social media. Let my primary network know that this exist and ask them to try it out. This is where I get feedback about the marketing. How do I promote it, will the initial users share my platform? This is the stage I'm in now in November of 2020. One important thing is to note how the new users describe the platform, because I want to use those words in my own communication about the platform. In this phase there are two key metrics that are interesting to look for. The first is if the initial users start using the product and if they keep using it for an extended period. The second thing is if they share it with friends. If there are people that I do not have in my own network that hear about the platform and start using it.
Step 10 - Business model
If you want to make money you have to create value. But how do you make sure that you do not spend too much time trying to create something that no one end up valuing? You listen. You follow the key metrics from step nine and keep an open dialog with your initial users to get valuable feedback. Make sure that all users notice that you are getting feature requests and have a plan for taking the product to the next level and make sure that they know that they will be a big part of influencing that journey. Then ask for funding, let the users pay an initial fee that will indicate to you that there is a wish from the users that you should continue building the product. You have done your part in building a proof of concept, now it is the users time to show that they like the product and believe in you enough that they are willing to pay an initial fee to show their support. When you got the usage and the funding you need, to give you the confidence that this is a product people are willing to pay for and are interested in using as well as tell their friends about, you move on with the plan. But if you do not have an urge to make any updates nor get the feedback you have hoped for, you just let the platform sit and start focusing on other things that might create value instead.
In this particular case I will continue to use the platform and I already have a list of updates that I want to add to the system. I have used the platform for about three months and it does what I intended for it to do, even if there are a few things that need to be tweaked here and there. The part that was missing and took a bit longer then I had anticipated was the possibility to grate groups of users that can share projects. This also include the functionality of getting the overview of what projects you colleagues are working on and you get an overview of the entire business in one page, that you interact with on a daily basis, which was the main goal of this entire exercise. Now it is time for the application to prove it's value over time and I will not do any major changes until I have feedback that indicate that there is potential for making this a full blown SAS solution.
Are you curious
If you want to try it out, you can register for free at conure.me. If you have any feedback, I hope you contact me so that I make updates and modifications or at least add your request to my list of potential upcoming features.
Hope you got some inspiration out of this post and that it inspired you enough to at least try out the application.
- Project management, Design, Application development